Imagine this: you’re working on a classic 1998 Chevrolet Camaro Z28, the engine purring like a lion. Suddenly, the “check engine” light pops up. You connect your trusty GM Tech 2 scan tool, but it’s not communicating. Frustrating, right? Setting up your GM Tech 2 correctly is crucial for accurate diagnostics and efficient repairs.
This guide will walk you through the setup process, answer frequently asked questions, and equip you with the knowledge to conquer any GM vehicle diagnostics challenge.
Understanding the Importance of a Properly Setup GM Tech 2
The GM Tech 2 scan tool is an indispensable tool for anyone working on General Motors vehicles. It’s more than just a code reader; it’s a powerful diagnostic system that provides access to various modules within the vehicle, allowing you to:
- Read and Clear Diagnostic Trouble Codes (DTCs): Identify the root cause of those pesky warning lights.
- View Live Data Streams: Monitor sensor readings in real-time to analyze system performance.
- Perform Actuator Tests: Verify the functionality of various components like solenoids, relays, and motors.
- Program and Configure Modules: Install new modules, update software, and personalize vehicle settings.
A misconfigured Tech 2 can lead to inaccurate readings, misdiagnoses, and wasted time. That’s why getting the setup right is crucial.
Setting Up Your GM Tech 2: A Step-by-Step Guide
1. Gather Your Equipment
Before you begin, ensure you have the following:
- GM Tech 2 Scan Tool: This includes the main unit, cables, and any necessary adapters.
- Appropriate Software Cartridge: Choose the cartridge specific to the make and model year of the vehicle you’re diagnosing.
- Power Supply: The Tech 2 can be powered through the vehicle’s OBD-II port or using a dedicated AC adapter.
- PC or Laptop (Optional): Required for software updates or advanced functionality.
2. Connect the Tech 2 to the Vehicle
- Locate the vehicle’s OBD-II port. It’s typically found under the dashboard on the driver’s side.
- Connect the OBD-II cable to the Tech 2 and then to the vehicle’s OBD-II port.
- Turn the vehicle’s ignition to the “ON” position without starting the engine.
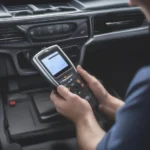
Here’s what connecting the Tech 2 to the vehicle might look like:
3. Power on the Tech 2 and Select the Vehicle
- Switch on the Tech 2 unit.
- Navigate through the menus to select the vehicle’s make, model, year, and engine type. This information is crucial for the tool to communicate with the vehicle’s specific modules.
4. Install the Software Cartridge (If Necessary)
- If required, insert the appropriate software cartridge into the Tech 2 unit. The software on the cartridge provides the necessary protocols and data to communicate with the vehicle’s specific systems.
5. Verify Communication and Begin Diagnosis
- Once the Tech 2 boots up, it should establish communication with the vehicle. You should see confirmation on the screen.
- You can now navigate through the various menus to read and clear codes, view live data, perform tests, and access other functions.
After successfully establishing communication, you’ll be presented with a user-friendly interface:
Common Questions About Setting Up a GM Tech 2
Q: My Tech 2 Won’t Communicate With the Vehicle. What Should I Do?
A: Several factors could cause communication issues:
- Check Connections: Ensure all cables are securely connected to both the Tech 2 and the vehicle’s OBD-II port.
- Verify Power: Confirm that the Tech 2 is receiving power, either through the vehicle or an AC adapter.
- Correct Vehicle Selection: Double-check that you’ve selected the correct make, model, year, and engine type in the Tech 2 menu.
- Software Cartridge: Make sure you’re using the appropriate software cartridge for the vehicle you’re diagnosing.
- OBD-II Port: Inspect the vehicle’s OBD-II port for any damage or debris that could be hindering communication.
Q: Can I Update My Tech 2 Software?
A: Yes, you can update the Tech 2 software using a PC or laptop and a special cable. Updates are crucial for ensuring compatibility with newer vehicle models and accessing the latest features.
Q: What is the Difference Between the Different Software Cartridges?
A: Each software cartridge is designed for a specific range of GM vehicle makes and models. For example, you might have a cartridge for Chevrolet passenger cars, one for Cadillac SUVs, and another for GMC trucks.
Troubleshooting Tips and Best Practices
- Consult Your User Manual: The Tech 2 user manual is an invaluable resource for troubleshooting, understanding menu options, and accessing advanced functions.
- Start With the Basics: When encountering problems, always begin by checking the basics like connections, power, and vehicle selection.
- Keep Your Software Updated: Regularly updating your Tech 2 software will ensure optimal performance and compatibility.


